March 6th, 2023
The Project
The objective of this project was to design a system for sorting and recycling containers. This involved selecting a container based on its material, transporting it to its respective drop-off location, and depositing it in the correct bin. The aim was to reduce wasted energy in the recycling process. The project was divided into two sub-teams: the computation sub-team, responsible for developing the sorting and transporting program, and the modeling sub-team, responsible for creating the mechanism that deposited containers into their bins.
My Role
As a member of the modeling team, I was involved in designing, manufacturing, and testing the mechanism. Below is a detailed account of the production process, including challenges and their resolutions.
Designing the Mechanism
Concept
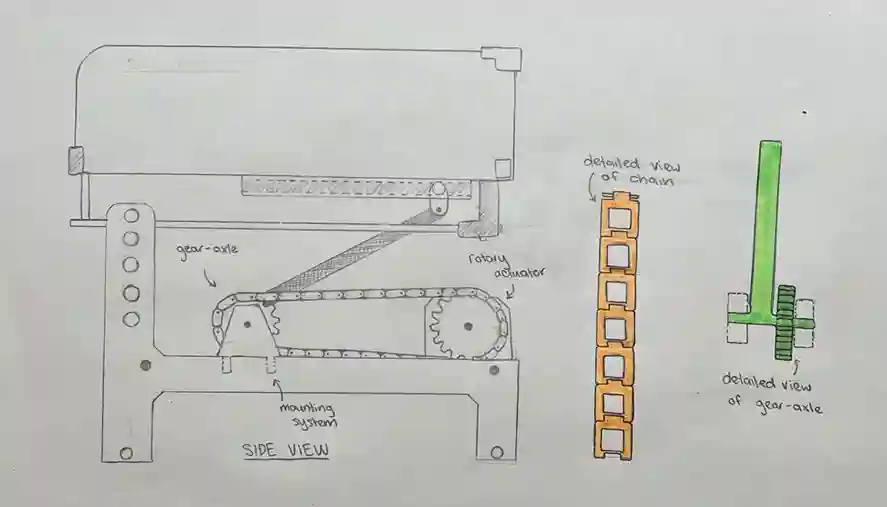
The sub-team devised multiple designs based on two main constraints: the available space for the mechanism to fit the platform, and the choice between two actuators, a linear and a rotary actuator. My design approach had two primary objectives: to create something mechanically interesting and to develop a feasible solution. I decided to base my design on a bicycle chain and gear system and produced the initial sketch shown below.
Developing a Model
The next phase of the project involved transforming our paper sketches into fully functional CAD models using Autodesk Inventor. After importing the given structure of the mechanism into Inventor, I began modeling each part in relation to the hopper assembly. One of my notable achievements in this project was creating a fully articulated chain, which required considerable effort and time.
The rest of the model was relatively straightforward to create. The gears were designed before the chain, allowing me to model the chain links to mesh specifically with the sprocket. The model underwent several iterations in response to real-world testing with 3D-printed parts. Below is the final working assembly. Although the chain does not move in sync with the rest of the mechanism due to computational constraints, it served its purpose during demonstrations.
Fabricating a Prototype
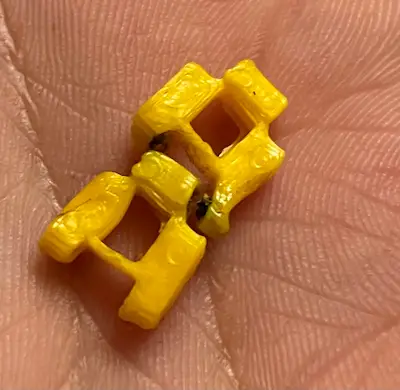
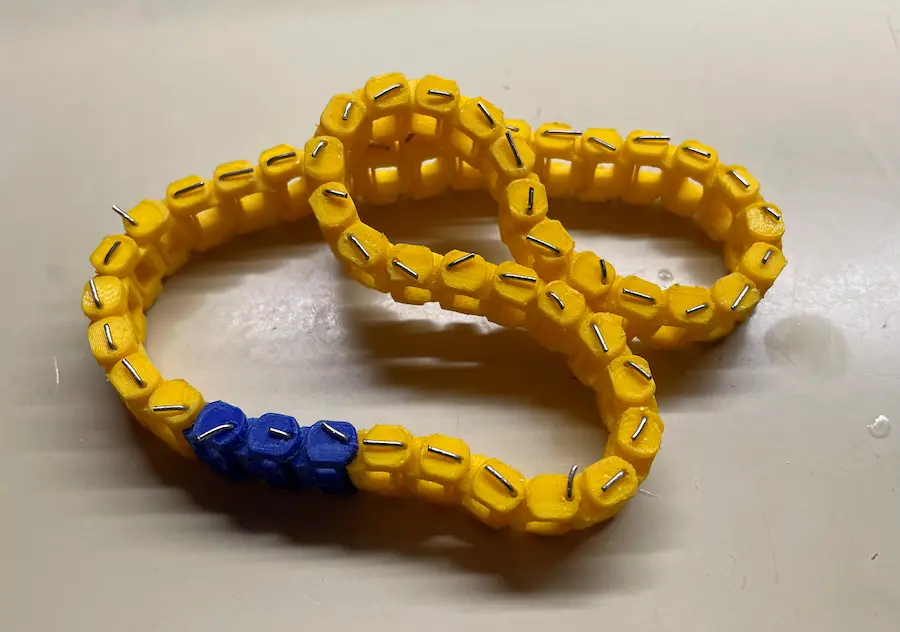
In this stage, we converted our digital design into a physical prototype using both 3D printing and laser cutting. As anticipated, the chain was the most challenging component to manufacture. We went through three or four iterations of the chain model. Early versions were too small to be practical.
The most difficult aspect of manufacturing nearly 60 chain links was the extensive cleanup required. When printing small parts, using supports such as a brim reduces the likelihood of print failures, but it also necessitates filing and trimming each part. In total, I spent over nine hours filing and fitting the parts.
Certain parts were better suited for laser cutting rather than 3D printing due to the strength advantages of the former. These included the two gears and the lever arm. The final fully assembled mechanism performed well during live demonstrations.